Welcome to CODAS training resources.
To move to a specific section of the course hover over the menu on the left hand side of the page to select the section you want to view.
CODAS Desktop – Logging In:
Select the CODAS icon from the Windows Desktop

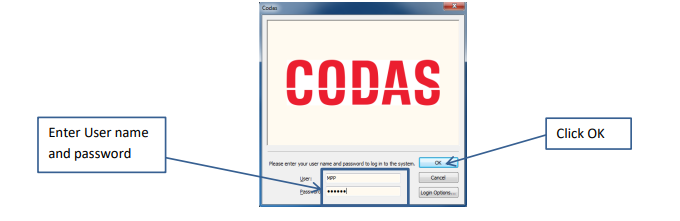
Double click to access the CODAS login screen:
The icons displayed on the desktop are determined by the licences and profile options that have been assigned to the user, allowing access to the modules of CODAS as required
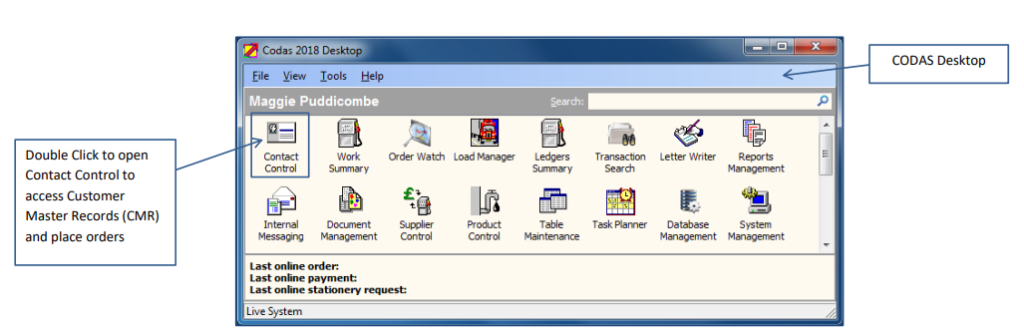
To access a module such as Contact Control (highlighted above); double click on the icon to open.
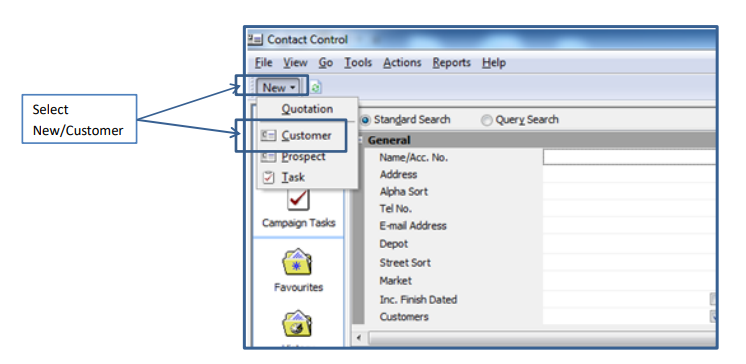
Add A New Customer
From the CODAS Desktop select Contact Control.
From the top left-hand corner click on ‘New’ and select Customer.
The New Customer Dialogue is displayed. Enter new customer details. For example:

- CODAS will check for duplicates and display options based on matching: telephone number; similar name and address information; post code.
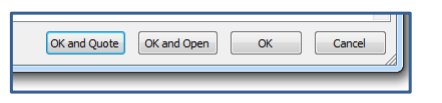
- Once all mandatory information has been entered, the following options are available:
- OK and Quote: save the new record and open the quote/order screen to add a new order.
- OK and Open: save the new record and open the customer record to add additional information
such as direct debit, scheduling or other contact info. - OK: save the new record.
- Cancel: abandon the creation of a new customer record